From vibe coding to vibe deployment. UBOS MCP turns ideas into infra with one message.
Bruno API MCP Server
A Model Context Protocol (MCP) server that exposes Bruno API collections as MCP tools. This server allows you to interact with your Bruno API collections through the MCP protocol, making your API collections accessible to AI agents and other MCP clients.
Why This Matters: Source Code and Data Working Together
When developers need to integrate APIs, they typically face three core challenges:
Debugging across system boundaries: Diagnosing issues across separate code and data environments requires constant context switching, making troubleshooting inefficient.
Creating custom tooling: Each third-party API integration requires building and maintaining custom tooling, causing development overhead and technical debt.
Building service UIs: Developing user interfaces for every backend service adds significant complexity and maintenance costs.
This server solves these precise problems by collocating your source code with your data. It transforms Bruno API collections into Model Context Protocol tools, enabling you to:
- Debug across previously separate environments with complete context
- Turn any API into an agent-ready tool without additional custom development
- Build headless services that can be controlled through AI interfaces
For development teams that need to accelerate API integration while reducing maintenance overhead, this approach fundamentally changes what’s possible - making previously complex integrations straightforward and accessible.
Features
- Automatic conversion of Bruno API collections to MCP tools
- Environment management for different API configurations
- HTTP with SSE transport
- Cross-origin support
- Built-in tools for API collection management
Usage
Install dependencies:
npm installStart the server with your Bruno API collection:
node --loader ts-node/esm src/index.ts --bruno-path /path/to/bruno/collection [--environment env_name] [--include-tools tool1,tool2,tool3] [--exclude-tools tool4,tool5]Options:
--bruno-pathor-b: Path to your Bruno API collection directory (required)--environmentor-e: Name of the environment to use (optional)--include-tools: Comma-separated list of tool names to include, filtering out all others (optional)--exclude-tools: Comma-separated list of tool names to exclude (optional)
Both formats are supported for the tool filtering options:
--include-tools tool1,tool2,tool3    # Space-separated format
--include-tools=tool1,tool2,tool3    # Equals-sign format
Connect from clients:
- Local connection:
http://localhost:8000/sse - From Windows to WSL:
http://<WSL_IP>:8000/sse - Get your WSL IP with:
hostname -I | awk '{print $1}'
- Local connection:
Predefined Scripts
The repository includes several predefined npm scripts for common use cases:
# Start the server with default settings
npm start

# Start with CFI API path
npm run start:cfi

# Start with local environment
npm run start:local

# Start with only specific tools included
npm run start:include-tools

# Start with specific tools excluded
npm run start:exclude-tools
Development
Running Tests
Run all tests:
npm test
Run specific test file:
npm test test/bruno-parser-auth.test.ts
Debugging
The server uses the debug library for detailed logging. You can enable different debug namespaces by setting the DEBUG environment variable:
# Debug everything
DEBUG=* npm start

# Debug specific components
DEBUG=bruno-parser npm start    # Debug Bruno parser operations
DEBUG=bruno-request npm start   # Debug request execution
DEBUG=bruno-tools npm start     # Debug tool creation and registration

# Debug multiple specific components
DEBUG=bruno-parser,bruno-request npm start

# On Windows CMD:
set DEBUG=bruno-parser,bruno-request && npm start

# On Windows PowerShell:
$env:DEBUG='bruno-parser,bruno-request'; npm start
Available debug namespaces:
bruno-parser: Bruno API collection parsing and environment handlingbruno-request: Request execution and response handlingbruno-tools: Tool creation and registration with MCP server
Tools
List Environments
Lists all available environments in your Bruno API collection:
- No parameters required
- Returns:
- List of available environments
- Currently active environment
Echo
Echoes back a message you send (useful for testing):
- Parameter:
message(string)
Bruno API Collection Structure
Your Bruno API collection should follow the standard Bruno structure:
collection/
├── collection.bru       # Collection settings
├── environments/       # Environment configurations
│   ├── local.bru
│   └── remote.bru
└── requests/          # API requests
    ├── request1.bru
    └── request2.bru
Each request in your collection will be automatically converted into an MCP tool, making it available for use through the MCP protocol.
Using Custom Parameters with Tools
When calling tools generated from your Bruno API collection, you can customize the request by providing:
Environment Override
You can specify a different environment for a specific request:
{
  "environment": "us-dev"
}
This will use the variables from the specified environment instead of the default one.
Variable Replacements
You can override specific variables for a single request:
{
"variables": {
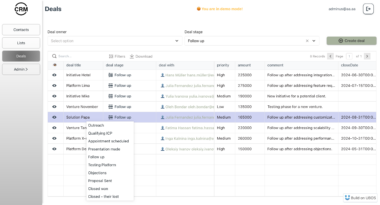
"dealId": "abc123",
"customerId": "xyz789",
"apiKey": "your-api-key"
}
}
These variables will be substituted in the URL, headers, and request body. For example, if your request URL is:
{{baseUrl}}/api/deal/{{dealId}}
And you provide { "variables": { "dealId": "abc123" } }, the actual URL used will be:
https://api.example.com/api/deal/abc123
Query Parameters
You can add or override query parameters directly:
{
  "query": {
    "limit": "10",
    "offset": "20",
    "search": "keyword"
  }
}
This will add these query parameters to the URL regardless of whether they are defined in the original request. For example, if your request URL is:
{{baseUrl}}/api/deals
And you provide { "query": { "limit": "10", "search": "keyword" } }, the actual URL used will be:
https://api.example.com/api/deals?limit=10&search=keyword
This approach is cleaner and more explicit than using variables to override query parameters.
Custom Body Parameters
You can also provide custom parameters in the request body:
{
  "body": {
    "name": "John Doe",
    "email": "john@example.com"
  }
}
Complete Example
Here’s a complete example combining all four types of customization:
{
  "environment": "staging",
  "variables": {
    "dealId": "abc123",
    "apiKey": "test-key-staging"
  },
  "query": {
    "limit": "5",
    "sort": "created_at"
  },
  "body": {
    "status": "approved",
    "amount": 5000
  }
}
License
MIT
Bruno API Server
Project Details
- djkz/bruno-api-mcp
- Last Updated: 3/25/2025
Recomended MCP Servers
Go server implementing Model Context Protocol (MCP) for filesystem operations.

Web3 MCP server for EVM chains (at moment)
A Model Context Protocol (MCP) server that enables secure interaction with OceanBase databases. This server allows AI assistants...
MCP-Server to query the experimental Anthropic Prompt Tools API
A Model-Context Protocol Server for YouTube
nRepl mcp server for clojure. Enables interaction with a running Clojure nREPL instance, allowing evaluation of Clojure code,...
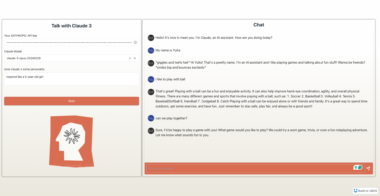
Two Truths and a Twist: The world's first Model Context Protocol game
Installs MCPs in cursor for you, give it a git URL and let it rip
An MCP extension package for OpenAI Agents SDK
Featured Templates
View More