From vibe coding to vibe deployment. UBOS MCP turns ideas into infra with one message.
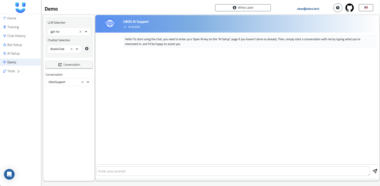
MCP Extension for SillyTavern
This extension adds WebSocket-based tool execution support to SillyTavern, allowing external tools to be registered and executed through a standardized interface.
Features
- WebSocket server for real-time communication
- Tool registration and execution system
- JSON Schema validation for tool definitions
- Real-time execution status updates
- Configurable logging and WebSocket settings
- Web-based settings UI integrated into SillyTavern
Installation
Method 1: Web Interface (Recommended)
See INSTRUCTIONS.md for step-by-step instructions on installing through SillyTavern’s web interface.
Method 2: Manual Installation
Clone this repository into your SillyTavern plugins directory:
cd /path/to/SillyTavern/plugins
git clone https://github.com/CG-Labs/SillyTavern-MCP-Extension.git mcp-extension
Install dependencies:
cd mcp-extension
npm install
Restart SillyTavern
Configuration
The extension can be configured through the SillyTavern UI under Settings > Extensions > MCP Extension.
Available Settings
- WebSocket Port: The port number for the WebSocket server (default: 5005)
- Log Level: Logging verbosity level (debug, info, warn, error)
Usage
Registering a Tool
To register a tool, send a WebSocket message with the following format:
{
    "type": "register_tool",
    "data": {
        "name": "example_tool",
        "schema": {
            "type": "object",
            "properties": {
                "param1": {
                    "type": "string",
                    "description": "First parameter"
                },
                "param2": {
                    "type": "number",
                    "description": "Second parameter"
                }
            },
            "required": ["param1"]
        }
    }
}
Executing a Tool
To execute a registered tool, send a WebSocket message with the following format:
{
    "type": "execute_tool",
    "data": {
        "executionId": "unique_execution_id",
        "name": "example_tool",
        "args": {
            "param1": "value1",
            "param2": 42
        }
    }
}
Execution Status Updates
The extension broadcasts execution status updates to all connected clients:
Execution Started
{
    "type": "tool_execution_started",
    "data": {
        "executionId": "unique_execution_id",
        "name": "example_tool",
        "args": {
            "param1": "value1",
            "param2": 42
        }
    }
}
Execution Completed
{
    "type": "tool_execution_completed",
    "data": {
        "executionId": "unique_execution_id",
        "result": {
            // Tool-specific result data
        }
    }
}
Execution Failed
{
    "type": "tool_execution_failed",
    "data": {
        "executionId": "unique_execution_id",
        "error": {
            "code": "ERROR_CODE",
            "message": "Error message"
        }
    }
}
Error Codes
INVALID_NAME: Invalid tool nameINVALID_SCHEMA: Invalid tool schemaINVALID_URI: Invalid resource URIINVALID_HANDLER: Invalid handler implementationINVALID_ARGUMENTS: Invalid tool argumentsTOOL_EXISTS: Tool already registeredTOOL_NOT_FOUND: Tool not foundTOOL_EXECUTION_FAILED: Tool execution failedSERVER_ERROR: Internal server error
Development
Project Structure
mcp-extension/
├── index.js              # Main plugin entry point
├── manifest.json         # Plugin manifest
├── package.json         # Dependencies and scripts
├── public/              # Public assets
│   ├── script.js        # Client-side JavaScript
│   ├── style.css        # Client-side styles
│   └── templates/       # HTML templates
├── utils/               # Utility modules
│   ├── errors.js        # Error handling
│   ├── logger.js        # Logging utility
│   └── validation.js    # Input validation
└── README.md            # This documentation
Adding New Tools
To add a new tool:
- Connect to the WebSocket server
- Register your tool with a schema
- Listen for execution requests
- Handle execution and return results
Example tool implementation:
const ws = new WebSocket('ws://localhost:5005');

ws.onopen = () => {
    // Register tool
    ws.send(JSON.stringify({
        type: 'register_tool',
        data: {
            name: 'example_tool',
            schema: {
                type: 'object',
                properties: {
                    input: {
                        type: 'string'
                    }
                },
                required: ['input']
            }
        }
    }));
};

ws.onmessage = (event) => {
    const message = JSON.parse(event.data);

    if (message.type === 'execute_tool' &&
        message.data.name === 'example_tool') {
        // Handle execution
        const result = doSomething(message.data.args.input);

        // Send result
        ws.send(JSON.stringify({
            type: 'tool_execution_completed',
            data: {
                executionId: message.data.executionId,
                result
            }
        }));
    }
};
Contributing
- Fork the repository
- Create a feature branch
- Commit your changes
- Push to the branch
- Create a Pull Request
Support
If you encounter any issues or have questions:
- Check the GitHub Issues for existing problems
- Create a new issue if your problem hasn’t been reported
- Join the SillyTavern Discord community for support
License
MIT License - see LICENSE file for details
SillyTavern MCP Server

Project Details
- CG-Labs/SillyTavern-MCP-Extension
- Last Updated: 4/21/2025
Recomended MCP Servers
An MCP for WireShark (tshark). Empower LLM's with realtime network traffic analysis capability
Collection of apple-native tools for the model context protocol.
MCP tools for Roaming RAG

MCP stdio server for frida
MCP server to interact with LogSeq via its Local HTTP API - enabling AI assistants like Claude to...
An MCP (Model Context Protocol) tool that provides stock market data and trading capabilities using the yfinance library,...
Generate image and video creatives using Placid.app templates in MCP compatible hosts
MCP server for retrieving relevant documentation from a knowledge base
 A MCP server for Unsplash image search.
Featured Templates
View More