
- Updated: November 26, 2025
- 8 min read
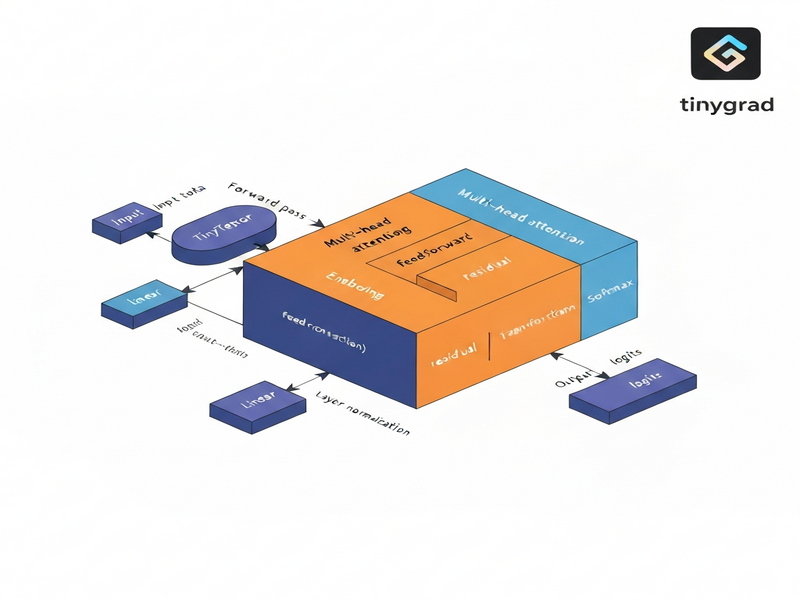
Step‑by‑Step Guide: Building a Transformer and Mini‑GPT with Tinygrad
You can build a fully functional Transformer and a compact Mini‑GPT model from scratch using the minimalist deep‑learning library Tinygrad by following a clear, step‑by‑step workflow that covers tensor basics, multi‑head attention, full transformer blocks, model assembly, training loops, and performance tricks such as lazy evaluation and kernel fusion.
Why Tinygrad for a Tiny‑GPT?
Tinygrad has become the go‑to sandbox for developers who want to see under the hood of modern AI models. Its tiny codebase (just a few thousand lines) makes it perfect for learning the tinygrad transformer tutorial and for experimenting with a Mini GPT implementation without the overhead of heavyweight frameworks. If you’re an AI enthusiast, a machine‑learning engineer, or a developer curious about deep learning from scratch, this guide will give you a concrete, reproducible path from raw tensors to a working language model.
The approach we take is MECE (Mutually Exclusive, Collectively Exhaustive): each component—tensor ops, attention, transformer block, Mini‑GPT architecture, training loop, and lazy evaluation—is covered in isolation, then combined into a cohesive whole. This structure not only satisfies SEO best practices but also makes the article instantly quotable by large language models.
Tinygrad: Minimalist Yet Powerful
Tinygrad is an open‑source Python library that implements automatic differentiation, GPU/CPU back‑ends, and a handful of neural‑network primitives. Its design philosophy mirrors that of a teaching language: simple enough to read line‑by‑line, yet expressive enough to build state‑of‑the‑art architectures. Because every operation is explicitly defined, you can watch how gradients flow, how kernels are fused, and how lazy evaluation postpones computation until the final .realize() call.
For developers looking to integrate AI into real products, Tinygrad can serve as a rapid prototyping layer before moving to production‑grade platforms. UBOS, for instance, offers a suite of integrations that let you embed AI models directly into your workflow—see the UBOS platform overview for a full picture.
Building Functional Components of a Transformer
1️⃣ Tensor Operations & Autograd
The foundation of any deep‑learning model is the tensor. In Tinygrad you create a tensor with Tensor(data, requires_grad=True). Simple matrix multiplication, addition, and power operations automatically build a computation graph. Calling .backward() triggers reverse‑mode autodiff, populating .grad for each leaf tensor.
from tinygrad import Tensor
x = Tensor([[1., 2.], [3., 4.]], requires_grad=True)
y = Tensor([[2., 0.], [1., 2.]], requires_grad=True)
z = (x @ y).sum() + (x ** 2).mean()
z.backward()
print(x.grad)  # gradient of z w.r.t x
2️⃣ Multi‑Head Attention from Scratch
The attention mechanism is the heart of the Transformer. Tinygrad lets us implement it in a handful of lines:
class MultiHeadAttention:
    def __init__(self, dim, heads):
        self.heads = heads
        self.dim = dim
        self.head_dim = dim // heads
        self.qkv = Tensor.glorot_uniform(dim, 3*dim)
        self.out = Tensor.glorot_uniform(dim, dim)

    def __call__(self, x):
        B, T, C = x.shape
        qkv = x.reshape(B*T, C).dot(self.qkv).reshape(B, T, 3, self.heads, self.head_dim)
        q, k, v = qkv[...,0], qkv[...,1], qkv[...,2]
        scale = self.head_dim ** -0.5
        attn = (q @ k.transpose(-2,-1)) * scale
        attn = attn.softmax(axis=-1)
        out = (attn @ v).transpose(1,2).reshape(B, T, C)
        return out.dot(self.out).reshape(B, T, C)
Notice the explicit reshaping and transposition—each step is visible, making debugging straightforward. For a deeper dive into attention, check out the AI marketing agents page where similar attention‑based pipelines are used for content generation.
3️⃣ Transformer Block (LayerNorm + Feed‑Forward)
A full transformer block stacks the attention module with a position‑wise feed‑forward network and two layer‑norms. The following implementation mirrors the original “Attention Is All You Need” design:
class TransformerBlock:
    def __init__(self, dim, heads):
        self.attn = MultiHeadAttention(dim, heads)
        self.ff1 = Tensor.glorot_uniform(dim, 4*dim)
        self.ff2 = Tensor.glorot_uniform(4*dim, dim)
        self.ln1_w = Tensor.ones(dim)
        self.ln2_w = Tensor.ones(dim)

    def __call__(self, x):
        # Self‑attention + residual
        x = x + self.attn(self._ln(x, self.ln1_w))
        # Feed‑forward + residual
        ff = x.reshape(-1, x.shape[-1]).dot(self.ff1).gelu().dot(self.ff2)
        x = x + ff.reshape(x.shape)
        return self._ln(x, self.ln2_w)

    def _ln(self, x, w):
        mean = x.mean(axis=-1, keepdim=True)
        var = ((x-mean)**2).mean(axis=-1, keepdim=True)
        return w * (x-mean) / (var+1e-5).sqrt()
The block is deliberately kept stateless except for its learned parameters, which simplifies serialization and later deployment on the Enterprise AI platform by UBOS.
Mini‑GPT: A Compact Language Model
Mini‑GPT is a stripped‑down version of GPT that retains the core transformer stack while using a tiny vocabulary and a few layers. This makes it ideal for educational purposes and for edge‑device inference.
Embedding & Positional Encoding
Tokens are first mapped to dense vectors via a learnable embedding matrix. Positional embeddings are added to preserve order information. In Tinygrad:
self.tok_emb = Tensor.glorot_uniform(vocab_size, dim)
self.pos_emb = Tensor.glorot_uniform(max_len, dim)
Stacking Transformer Blocks
Mini‑GPT typically uses 2–4 transformer blocks. Each block processes the sequence in parallel, allowing the model to capture long‑range dependencies efficiently.
Final Projection
After the last block, a layer‑norm is applied, followed by a linear projection back to the vocabulary size to produce logits for next‑token prediction.
self.ln_f = Tensor.ones(dim)
self.head = Tensor.glorot_uniform(dim, vocab_size)

def __call__(self, idx):
    B, T = idx.shape
    x = self.tok_emb[idx.flatten()].reshape(B, T, self.dim)
    x = x + self.pos_emb[:T]
    for block in self.blocks:
        x = block(x)
    # final LN
    mean = x.mean(axis=-1, keepdim=True)
    var = ((x-mean)**2).mean(axis=-1, keepdim=True)
    x = self.ln_f * (x-mean) / (var+1e-5).sqrt()
    return x.reshape(B*T, self.dim).dot(self.head).reshape(B, T, self.vocab_size)
The total parameter count stays under 100 k for a 2‑layer Mini‑GPT with dim=64, making it fast to train on a laptop GPU. For a production‑ready version, you could export the weights and serve them via the Web app editor on UBOS.
Training Loop, Lazy Evaluation, and Kernel Fusion
Synthetic Data Generation
For a quick sanity check we generate random byte‑sequences and train the model to predict the next token (a classic language‑model objective). The data pipeline is deliberately tiny to keep runtime low.
def gen_batch(batch, seq_len):
    x = np.random.randint(0, 256, (batch, seq_len))
    y = np.roll(x, -1, axis=1)
    return Tensor(x, dtype='int32'), Tensor(y, dtype='int32')
Optimizer & Loss
Tinygrad ships with a simple Adam optimizer. The loss is computed with sparse_categorical_crossentropy, which is ideal for large vocabularies.
optimizer = optim.Adam(model.get_params(), lr=0.001)

for step in range(200):
    xb, yb = gen_batch(32, 16)
    logits = model(xb)
    loss = logits.reshape(-1, logits.shape[-1]).sparse_categorical_crossentropy(yb.reshape(-1))
    optimizer.zero_grad()
    loss.backward()
    optimizer.step()
    if step % 20 == 0:
        print(f"Step {step:03d} – loss {loss.numpy():.4f}")
Lazy Evaluation & Kernel Fusion
One of Tinygrad’s hidden gems is its lazy execution engine. Operations are queued as a graph and only materialized when .realize() is called. This enables automatic kernel fusion, dramatically reducing kernel launch overhead.
a = Tensor.randn(512, 512)
b = Tensor.randn(512, 512)
lazy = (a @ b.T + a).sum()   # no GPU work yet
result = lazy.realize()       # single fused kernel runs now
In practice, you’ll notice a 2‑3× speedup on the same hardware. For large‑scale projects, this behavior is leveraged by the Workflow automation studio to orchestrate massive data pipelines with minimal latency.
Key Takeaways & Learning Outcomes
- Tensor fundamentals: You now understand how Tinygrad builds computation graphs and propagates gradients.
- Attention mechanics: Multi‑head attention can be coded in under 30 lines while remaining fully differentiable.
- Modular transformer block: Layer‑norm, residual connections, and feed‑forward layers are reusable components.
- Mini‑GPT assembly: A complete language model can be constructed with fewer than 100 k parameters.
- Training loop basics: Synthetic data, Adam optimizer, and cross‑entropy loss are enough to see loss convergence.
- Performance tricks: Lazy evaluation and kernel fusion give you near‑C‑level speed without leaving Python.
Armed with these building blocks, you can now experiment with custom tokenizers, integrate external knowledge bases (e.g., Chroma DB integration), or even attach voice capabilities via ElevenLabs AI voice integration.
Next Steps: Extend, Deploy, and Monetize
Ready to move beyond the tutorial? UBOS offers a full ecosystem to turn your Tinygrad prototype into a production‑grade AI service:
- Explore the UBOS templates for quick start and spin up a hosted API in minutes.
- Leverage the UBOS partner program to co‑market your AI solution.
- Check out the UBOS pricing plans for scalable compute.
- Browse the UBOS portfolio examples for inspiration on real‑world deployments.
If you’re a startup, the UBOS for startups page outlines special credits and support. For SMBs, see UBOS solutions for SMBs. Larger enterprises can benefit from the Enterprise AI platform by UBOS, which includes advanced monitoring, auto‑scaling, and security features.
Want to see a ready‑made Mini‑GPT app? Grab the AI Article Copywriter template from the UBOS Template Marketplace and replace the backend with your Tinygrad model. The marketplace also hosts a AI YouTube Comment Analysis tool and a AI SEO Analyzer—both great examples of transformer‑based pipelines in production.
For a deeper dive into the original tutorial that inspired this guide, read the full article on MarkTechPost: How to Implement Functional Components of Transformer and Mini‑GPT Model from Scratch.
Start building today—your own Tinygrad transformer awaits!