From vibe coding to vibe deployment. UBOS MCP turns ideas into infra with one message.
Snowflake MCP (Model Context Protocol) Server
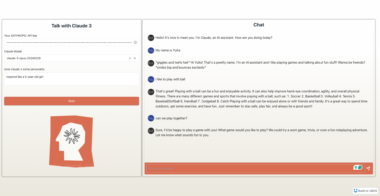
A Model Context Protocol (MCP) server implementation that allows AI assistants like Claude to interact with Snowflake databases through natural language queries.
![]()
Features
- Execute SQL queries on Snowflake databases via natural language
- Automatic database connection lifecycle management (connect, reconnect, close)
- Integration with Claude, Cursor IDE, and other MCP-compatible clients
- Convert natural language to SQL using semantic understanding
- Handle query results and format them for easy reading
- Secure database operations with proper authentication
Prerequisites
- Python 3.8+
- Snowflake account with appropriate access permissions
- MCP-compatible client (Claude, Cursor IDE, etc.)
Installation
- Clone this repository:
git clone https://github.com/yourusername/snowflake-mcp.git
cd snowflake-mcp
- Install the required dependencies:
pip install -r requirements.txt
- Copy the sample environment file and add your Snowflake credentials:
cp .env.sample .env
# Edit .env with your Snowflake credentials
Configuration
Environment Variables
Create a .env file with your Snowflake credentials:
SNOWFLAKE_USER=your_username
SNOWFLAKE_PASSWORD=your_password
SNOWFLAKE_ACCOUNT=your_account_locator  # e.g., xy12345.us-east-2
SNOWFLAKE_DATABASE=your_database
SNOWFLAKE_WAREHOUSE=your_warehouse
SNOWFLAKE_SCHEMA=your_schema  # Optional, defaults to PUBLIC
SNOWFLAKE_ROLE=your_role  # Optional, defaults to user's default role
MCP Client Configuration
For Cursor IDE:
Cursor automatically discovers and integrates with MCP servers. Just make sure the server is running.
For Claude Desktop:
Add the following to your claude_desktop_config.json file:
{
  "mcpServers": {
    "snowflake": {
      "command": "/path/to/python",
      "args": ["/path/to/snowflake-mcp/src/server.py"]
    }
  }
}
Replace /path/to/python with the path to your Python interpreter, and /path/to/snowflake-mcp with the full path to where you cloned this repository.
Usage
The Snowflake MCP server implements the Model Context Protocol (MCP) specification, allowing AI systems like Claude to connect to Snowflake databases through natural language.
Using MCP CLI (Recommended)
The MCP Python SDK includes a command-line interface that makes it easy to run and manage MCP servers:
- Development Mode with Inspector UI:
mcp dev src/server.py
This starts the server and opens an inspector interface in your browser where you can test the tools.
- Install in Claude Desktop:
mcp install src/server.py
This installs the server in Claude Desktop, making it available for Claude to use.
- Standard Mode:
mcp run src/server.py
This runs the server in standard mode without the inspector interface.
Available Tools
The Snowflake MCP server provides the following tools:
- query_database - Execute SQL or natural language queries on Snowflake
- list_tables - List all tables in the database
- get_table_schema - Get the schema of a specific table
For more examples and detailed parameter information, check the examples/README.md file.
Running Manually
You can also run the server directly, which is useful for debugging:
python src/server.py
This starts the server in standalone mode using stdio transport.
Deployment
Hosting on Smithery
This server can be hosted on Smithery.ai for easy access by other users:
- Create an account on Smithery.ai
- Add your server to the Smithery registry
- Configure deployment using the Dockerfile in this repository
- Click “Deploy” on the Deployments tab on your server page
The Dockerfile is already configured to properly build and run the server with WebSocket transport support for Smithery hosting.
Security Considerations
When hosting your Snowflake MCP server publicly:
- Consider using a read-only Snowflake account
- Restrict access to specific schemas/tables
- Use environment variables for secure credential management
Development
To contribute to this project:
- Fork the repository
- Create a feature branch:
git checkout -b feature/new-feature - Make your changes
- Run tests:
pytest - Commit your changes:
git commit -m 'Add new feature' - Push to the branch:
git push origin feature/new-feature - Submit a pull request
License
MIT License
Acknowledgements
- The Model Context Protocol team for creating the standard
- Snowflake for their robust database and API
Snowflake MCP Server
Project Details
- peterdonaghey/snowflake-mcp
- MIT License
- Last Updated: 3/7/2025
Recomended MCP Servers

Model Context Protocol (MCP) server for Bing Webmaster Tools (BWT) allowing Claude.ai and other clients to interact with...
A powerful MCP server for Google search that enables parallel searching with multiple keywords simultaneously.
EVE Online Market MCP Server - A Model Context Protocol server for accessing EVE Online market data through...
MCP server for Coolify
Query and Summarize your chat messages.
Brings MCP to ChatGPT, DeepSeek, Perplexity, Grok, Gemini, Google AI Studio, OpenRouter, DeepSeek, Kagi, T3 Chat and more...
Featured Templates
View More