
- Updated: January 5, 2026
- 7 min read
Three.js Smoke Shader Tutorial: Create Realistic 3D Smoke Effects
Three.js Smoke Shader Tutorial: Step‑by‑Step Guide
The Three.js smoke shader tutorial demonstrates how to build a realistic, animated smoke effect in WebGL by combining a Perlin‑noise texture, UV‑based masking, time‑driven animation, edge fading, geometry twisting, and proper occlusion handling.
Why Smoke Effects Matter in Modern Web Graphics
Smoke, fog, and vapor are among the most compelling visual cues for creating atmosphere in interactive 3D scenes. Whether you’re building a game, a data‑visualisation dashboard, or an immersive marketing landing page, a well‑crafted smoke shader can turn a static canvas into a living, breathing environment. This article breaks down the Three.js smoke shader tutorial into clear, MECE‑structured steps, so front‑end engineers and creative coders can reproduce the effect quickly and extend it for their own projects.
Overview of the Three.js Smoke Shader Tutorial
The original tutorial, published on a leading WebGL blog, walks readers through a complete pipeline:
- Setting up a basic Three.js scene with a plane geometry.
- Loading a Perlin‑noise texture that serves as the smoke density map.
- Mapping UV coordinates to the fragment shader and turning the texture into a mask.
- Animating the texture vertically to simulate rising smoke.
- Remapping color values for realistic translucency.
- Fading edges to avoid hard borders.
- Twisting the geometry to give the smoke a three‑dimensional swirl.
- Disabling depth write for proper occlusion of overlapping smoke layers.
By the end of the tutorial, you have a reusable THREE.ShaderMaterial that can be dropped into any Three.js project.
Key Steps and Techniques
1️⃣ Scene Setup
A minimal Three.js scene consists of a THREE.Scene, a THREE.PerspectiveCamera, and a THREE.WebGLRenderer. The smoke will be rendered on a THREE.PlaneGeometry that faces the camera.
const scene = new THREE.Scene();
const camera = new THREE.PerspectiveCamera(45, aspect, 0.1, 100);
camera.position.set(0, 1, 3);
const renderer = new THREE.WebGLRenderer({ antialias: true });
renderer.setSize(window.innerWidth, window.innerHeight);
document.body.appendChild(renderer.domElement);

const geometry = new THREE.PlaneGeometry(2, 2, 1, 1);
2️⃣ Loading the Perlin‑Noise Texture
Perlin noise provides the random, cloud‑like density needed for smoke. The tutorial uses a grayscale PNG that is loaded via THREE.TextureLoader. The texture is set to repeat vertically so the animation can loop seamlessly.
const loader = new THREE.TextureLoader();
const smokeTex = loader.load('path/to/perlin-noise.png');
smokeTex.wrapT = THREE.RepeatWrapping;
3️⃣ UV Mapping & Masking
The fragment shader receives the UV coordinates from the vertex shader. By using the texture’s red channel as the alpha value and forcing the RGB to white, the texture becomes a mask that defines where smoke is opaque.
uniform sampler2D uTexture;
varying vec2 vUv;

void main() {
  float density = texture(uTexture, vUv).r;
  gl_FragColor = vec4(1.0, 1.0, 1.0, density);
}
Remember to enable transparent: true on the material so the WebGL pipeline respects the varying alpha.
4️⃣ Time‑Driven Animation
To simulate rising smoke, the shader shifts the texture’s vUv.y coordinate based on a uTime uniform. The JavaScript side updates this uniform each frame using THREE.Clock.
uniform float uTime;
uniform float uSpeed;

void main() {
  vec2 uv = vUv;
  uv.y -= uTime * uSpeed; // scroll texture upward
  float density = texture(uTexture, uv).r;
  gl_FragColor = vec4(1.0, 1.0, 1.0, density);
}
The uSpeed parameter lets you control how fast the smoke rises.
5️⃣ Color Remapping & Edge Fading
Raw Perlin noise often looks too dense. The smoothstep function remaps the density range, turning dark grays into full transparency and bright spots into opaque smoke.
uniform float uRemapLow;
uniform float uRemapHigh;

float density = texture(uTexture, uv).r;
density = smoothstep(uRemapLow, uRemapHigh, density);
Edge fading prevents a hard rectangular silhouette. By applying another smoothstep on the UV coordinates, the opacity gradually drops toward the plane’s borders.
float fadeX = smoothstep(0.0, uEdgeX, vUv.x) *
               smoothstep(1.0, 1.0 - uEdgeX, vUv.x);
float fadeY = smoothstep(0.0, uEdgeY, vUv.y) *
               smoothstep(1.0, 1.0 - uEdgeY, vUv.y);
float edgeFade = fadeX * fadeY;
gl_FragColor.a = density * edgeFade;
6️⃣ Geometry Twisting for 3‑D Swirl
A flat plane looks like a sheet of smoke. To give it volume, the vertex shader twists each vertex around the Y‑axis based on a random value sampled from the same noise texture. This creates a subtle spiral that mimics real smoke currents.
uniform float uTwistStrength;
uniform float uTwistSampleX;
uniform float uTwistSampleHeight;
uniform float uTime;
uniform float uTwistSpeed;

varying vec2 vUv;

vec2 rotate2D(vec2 v, float a) {
  float s = sin(a), c = cos(a);
  return mat2(c, s, -s, c) * v;
}

void main() {
  vUv = uv;
  float y = uv.y * uTwistSampleHeight - uTime * uTwistSpeed;
  float sample = texture(uTexture, vec2(uTwistSampleX, y)).r;
  float angle = sample * uTwistStrength;
  vec3 pos = position;
  pos.xz = rotate2D(pos.xz, angle);
  gl_Position = projectionMatrix * modelViewMatrix * vec4(pos, 1.0);
}
7️⃣ Occlusion Handling (Depth Write)
Transparent objects in Three.js normally write to the depth buffer, which can cause nearer smoke layers to hide farther ones. Disabling depthWrite ensures every fragment is blended correctly, preserving the volumetric feel.
const smokeMaterial = new THREE.ShaderMaterial({
  uniforms: {...},
  vertexShader: vertexSrc,
  fragmentShader: fragmentSrc,
  transparent: true,
  depthWrite: false,
});
Benefits and Real‑World Use Cases
Implementing a smoke shader brings several tangible advantages:
- Performance‑friendly: The effect runs entirely on the GPU, keeping CPU load low.
- Scalable: Adjust texture size, plane count, or twist intensity without rewriting code.
- Brand storytelling: Add atmospheric layers to product demos, landing pages, or interactive tutorials.
- Data visualisation: Use smoke to highlight trends, e.g., rising market sentiment or network traffic.
- Game design: Create dynamic fog, magical spells, or engine exhaust with minimal assets.
Because the shader is modular, you can swap the noise texture for any custom pattern—think fire, water droplets, or abstract particles—making it a versatile building block for many visual effects.
Resulting Smoke Effect
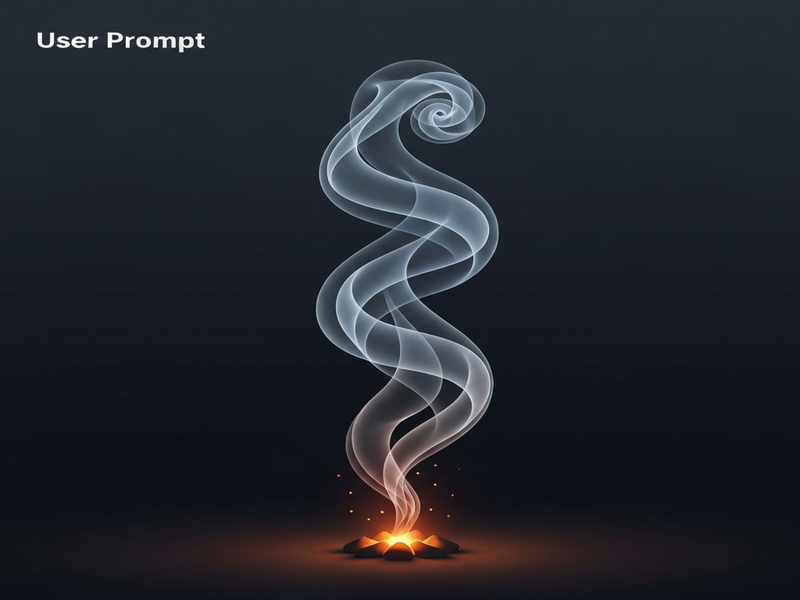
Figure 1 – A live preview of the animated smoke shader created with Three.js.
Read the Original Tutorial
For a line‑by‑line walkthrough, see the original article on the author’s site:
Three.js Smoke Shader Tutorial – Full Guide.
Explore More with UBOS
If you’re looking to integrate this shader into a larger AI‑driven web app, UBOS offers a suite of tools that can accelerate development:
- UBOS platform overview – a low‑code environment for deploying Three.js projects at scale.
- AI marketing agents that can dynamically adjust visual effects based on user behavior.
- Workflow automation studio to trigger shader parameter changes from external APIs.
- Web app editor on UBOS for rapid prototyping of interactive 3D pages.
- UBOS for startups – cost‑effective plans for early‑stage teams.
- UBOS solutions for SMBs that need custom visualizations without a large dev team.
- Enterprise AI platform by UBOS for large‑scale deployments and analytics.
- UBOS homepage for a quick start guide and community resources.
- About UBOS to learn about the team behind the platform.
- UBOS partner program – collaborate on custom shader packs.
- UBOS pricing plans that fit any budget.
- UBOS portfolio examples showcasing real‑world 3D applications.
- UBOS templates for quick start – start with a pre‑built Three.js scene.
- AI SEO Analyzer – boost your site’s visibility with AI‑powered insights.
- AI Video Generator for creating promotional clips of your 3D smoke demo.
- AI Chatbot template – add conversational support to your interactive demo.
- Talk with Claude AI app – experiment with AI‑generated dialogue inside your 3D scene.
- Image Generation with Stable Diffusion – create custom smoke textures on the fly.
- GPT-Powered Telegram Bot – integrate real‑time control of shader parameters via chat.
- AI Image Generator – produce background assets that complement your smoke effect.
Conclusion
Mastering the Three.js smoke shader equips you with a reusable visual primitive that can elevate any web‑based experience. By following the step‑by‑step guide above, you’ll have a performant, customizable smoke effect ready for integration with AI‑driven workflows, marketing automation, or immersive storytelling.
Ready to turn your ideas into reality? Start building on the UBOS platform today, and leverage our AI‑enhanced tools to accelerate development, reduce costs, and deliver stunning 3D experiences that stand out in search and on social media.