From vibe coding to vibe deployment. UBOS MCP turns ideas into infra with one message.
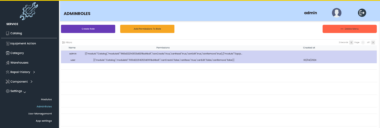
MCP Vulnerability Management System
MCP (Management Control Panel) is a comprehensive vulnerability management system that helps organizations track, manage, and respond to security vulnerabilities effectively.
Features
- User Authentication and Authorization
- Admin Dashboard
- User Profile Management
- Vulnerability Tracking
- Support Ticket System
- API Key Management
- SSL Certificate Management
- Newsletter Subscription
- Activity Logging
Prerequisites
- Python 3.11 or higher
- PostgreSQL 15 or higher
- Docker and Docker Compose (optional)
Installation
Option 1: Using Docker (Recommended)
- Clone the repository:
git clone https://github.com/yourusername/mcp.git
cd mcp
- Create a .env file:
cp .env.example .env
Edit the .env file with your configuration.
- Build and start the containers:
docker-compose up -d
- Create the admin user:
docker-compose exec app python install.py
Option 2: Manual Installation
- Clone the repository:
git clone https://github.com/yourusername/mcp.git
cd mcp
- Create and activate a virtual environment:
python -m venv venv
source venv/bin/activate  # On Windows: venvScriptsactivate
- Install dependencies:
pip install -r requirements.txt
- Create a .env file:
cp .env.example .env
Edit the .env file with your configuration.
- Set up the database:
createdb mcp
- Create the admin user:
python install.py
- Start the application:
uvicorn app.main:app --host 0.0.0.0 --port 8000
Usage
- Access the application at http://localhost:8000
- Log in with your admin credentials
- Configure SSL certificates in the admin interface
- Start managing vulnerabilities and users
API Documentation
The API documentation is available at:
- Swagger UI: http://localhost:8000/docs
- ReDoc: http://localhost:8000/redoc
Development
Running Tests
pytest
Code Style
This project follows PEP 8 guidelines. To check your code:
flake8
Database Migrations
To create a new migration:
alembic revision --autogenerate -m "description"
To apply migrations:
alembic upgrade head
Contributing
- Fork the repository
- Create a feature branch
- Commit your changes
- Push to the branch
- Create a Pull Request
License
This project is licensed under the MIT License - see the LICENSE file for details.
Support
For support, please open an issue in the GitHub repository or contact the maintainers.
Management Control Panel
Project Details
- nesirat/MCP
- MIT License
- Last Updated: 4/9/2025
Recomended MCP Servers
Dingo: A Comprehensive Data Quality Evaluation Tool
MCP Server for Odoo

Sample MCP Server for testing
Static Code Analysis and Visualization. Convert Code to UML and Flow Diagram and explain by AI.
Model Context Protocol server for managing, storing, and providing prompts and prompt templates for LLM interactions.
Model Context Protocol Servers
A Model Context Protocol (MCP) server for interacting with the OneSignal API
A lightweight mcp server that tells you exactly what time is it based on your IP.
WhatsApp MCP Server (TypeScript/Baileys)
A lightweight library for portable low-level GPU computation using WebGPU.
Featured Templates
View More